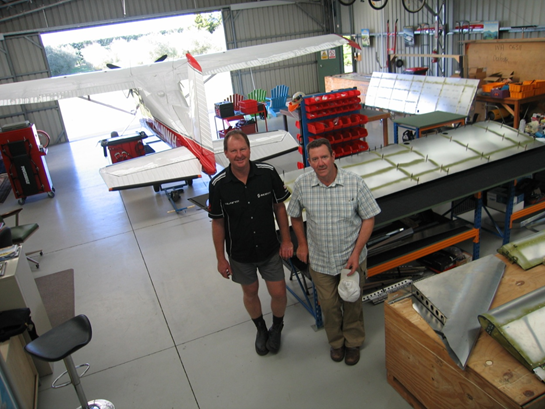
Builders Haydn Bell and Philip Seale
SAANZ Mentor Evan Bellworthy
Build at the Westwind Aviation hanger Forest Field (NZFF) Canterbury South Island.
Philip is the I.C.P. Agent for Savannah S and Ventura aircraft and kit sets in New Zealand.
![]()
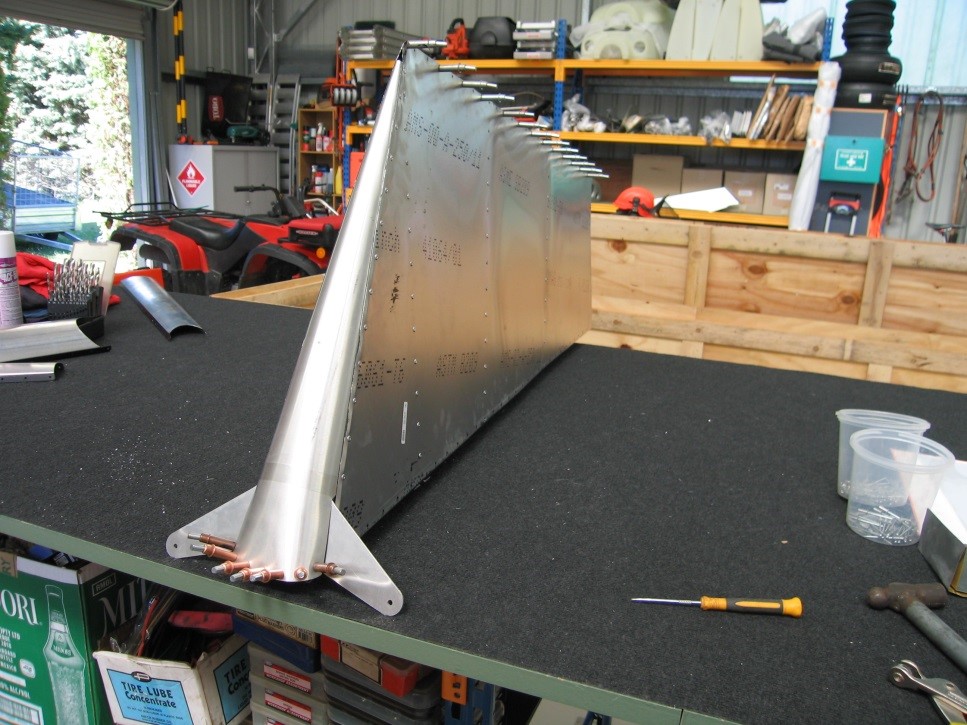
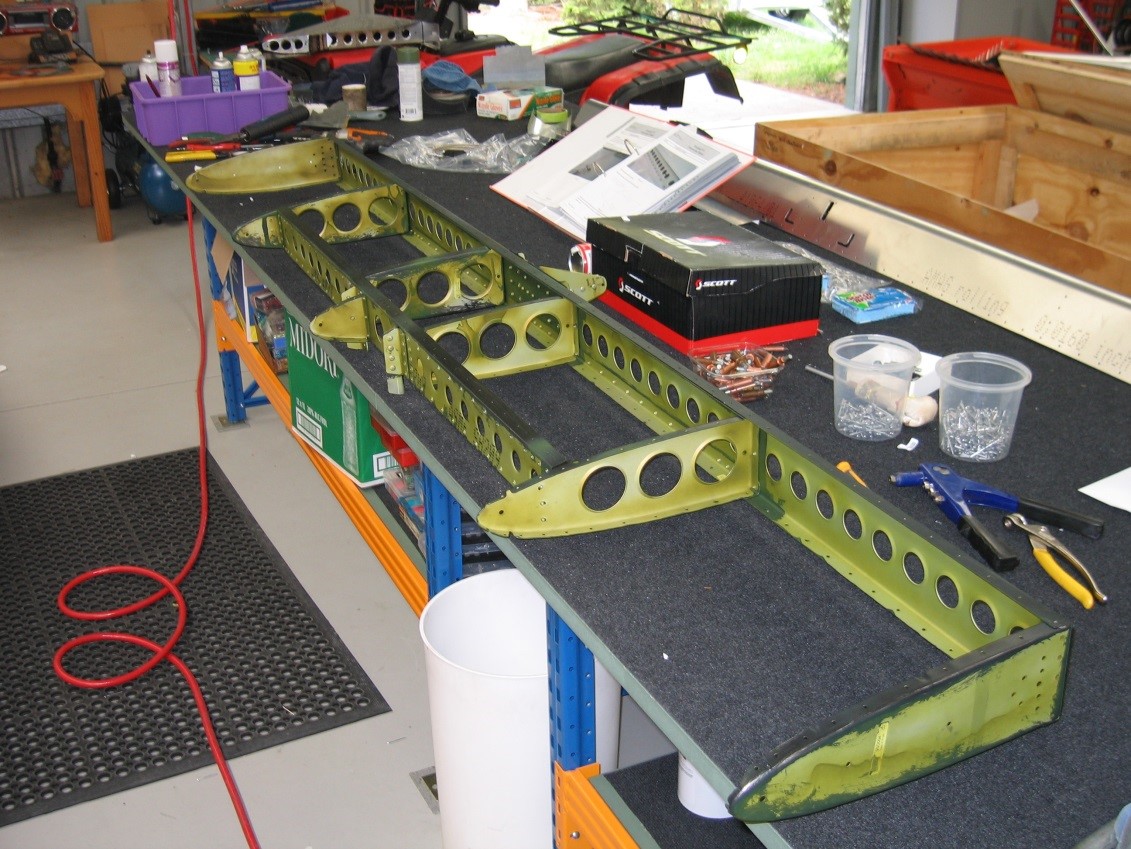
CAP 10 Fin Assembly
Fin was chosen as starting point as it was a simple confidence building part to assemble. Note when the lower leading edge rib was riveted, the skin was indented. This appears to be common with all builds. We will drill out and pack a 0.5mm plate behind to remedy this.
Rudder Frame assembly
With the rear of the aircraft seeming a good place to continue we built the frame for the Rudder. All riveted surfaces in contact with each other are primed with a black water based primer on this aircraft. ICP advises that all Aluminium supplied for the assembly is a non-corrosion Aluminium alloy 6061 T6 and as such does not need to be painted with primer. Rudder was then skinned with the trailing edge trim tab attached. Late in the day commenced the Elevator frame, time taken to read the manual as there seemed ambiguity with some directions, mystery solved when discovered a couple of mirrored parts whose numbers were incorrect. Part Number SD011-2 required one to physically look at it and note the correct offset prior to assembly.
Elevator assembly continued
Note to read the instructions carefully as the Trim Tab (anti balance) is on the LHS and you find that the end cap pivot point pins are of different length (9SE040 and 9SE041). The longer one is in order to accommodate the push rod for the Trim Tab. Final assembly of skins was straight forward. Primed and finished today.
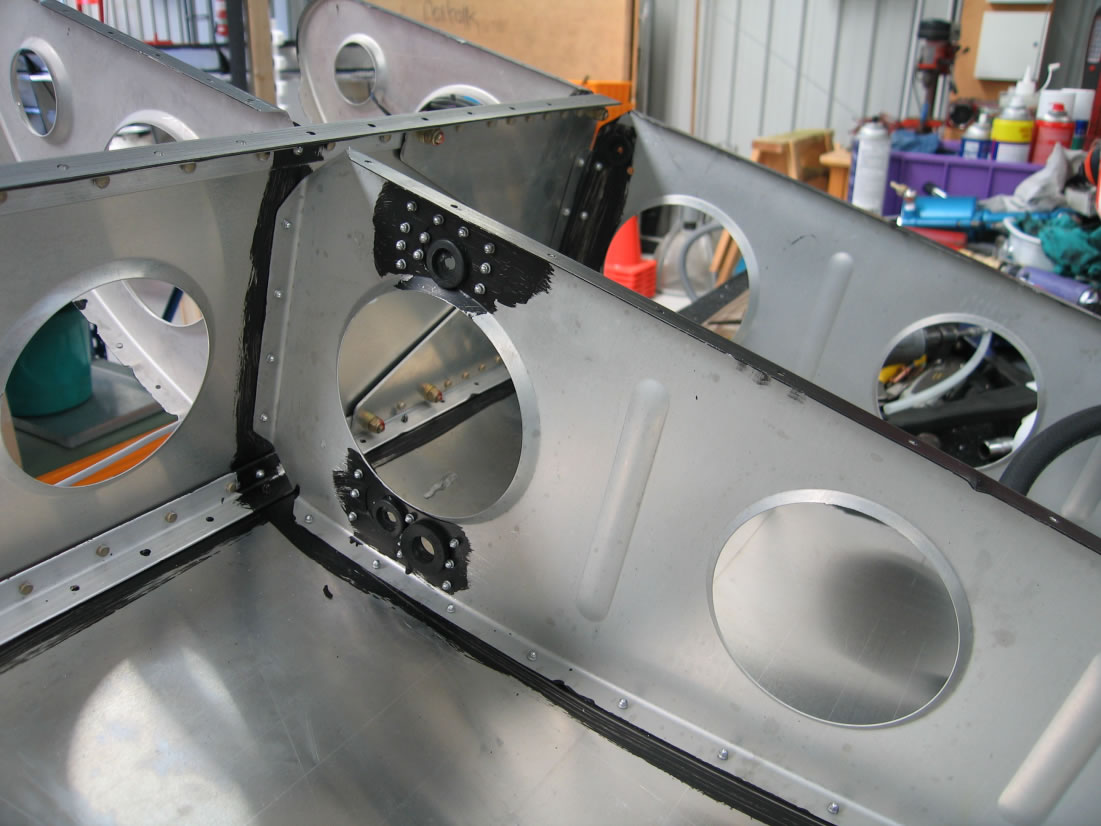
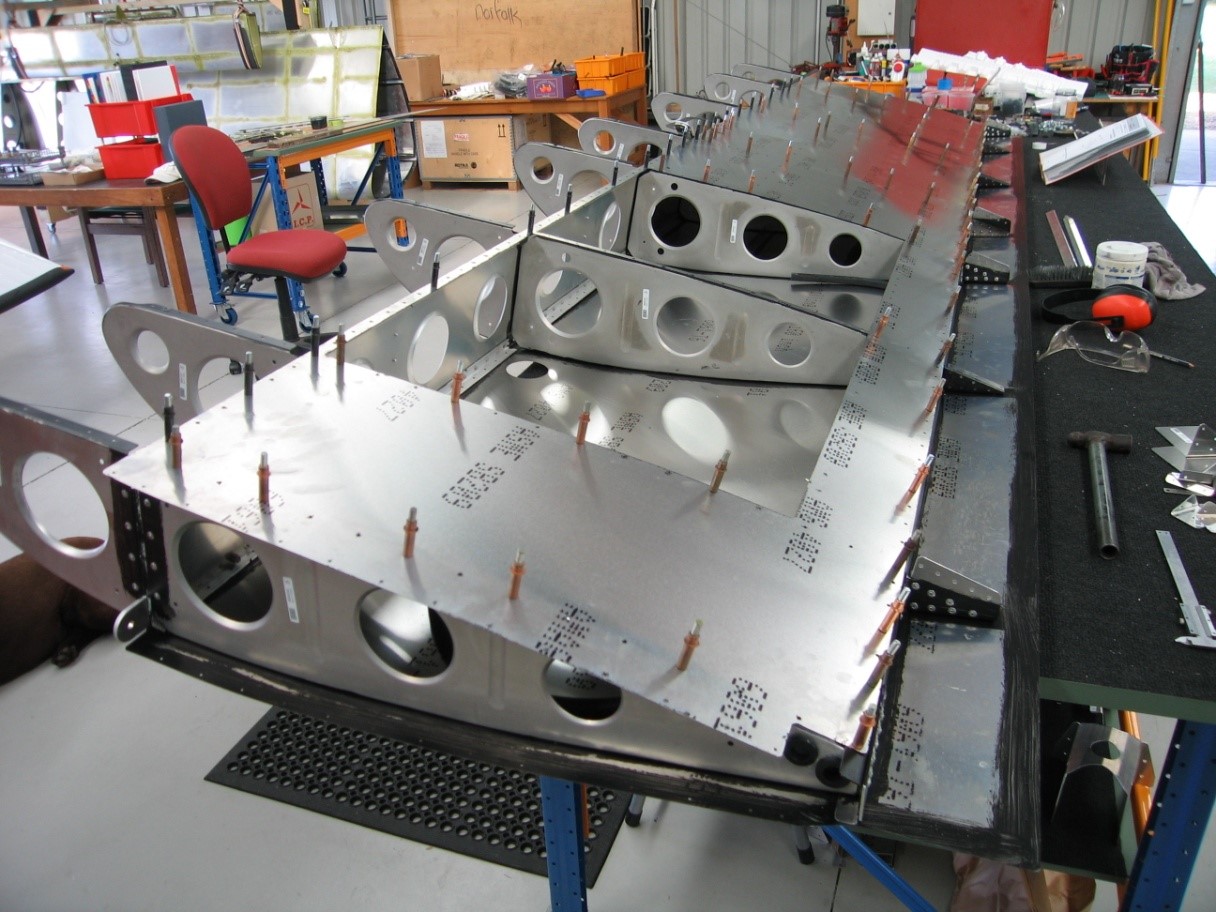
Horizontal Stabiliser commenced.
This is the first part we will modify using a redundant section of the outboard Fuel Tanks. Using an angular section we will attach to the inner skin on the left and right outer forward sections of the skin overlaps. Once parts prepped (de-burring tool, prodger and fine file if necessary) applied black primer and assembled the front and rear longeron and ribs.
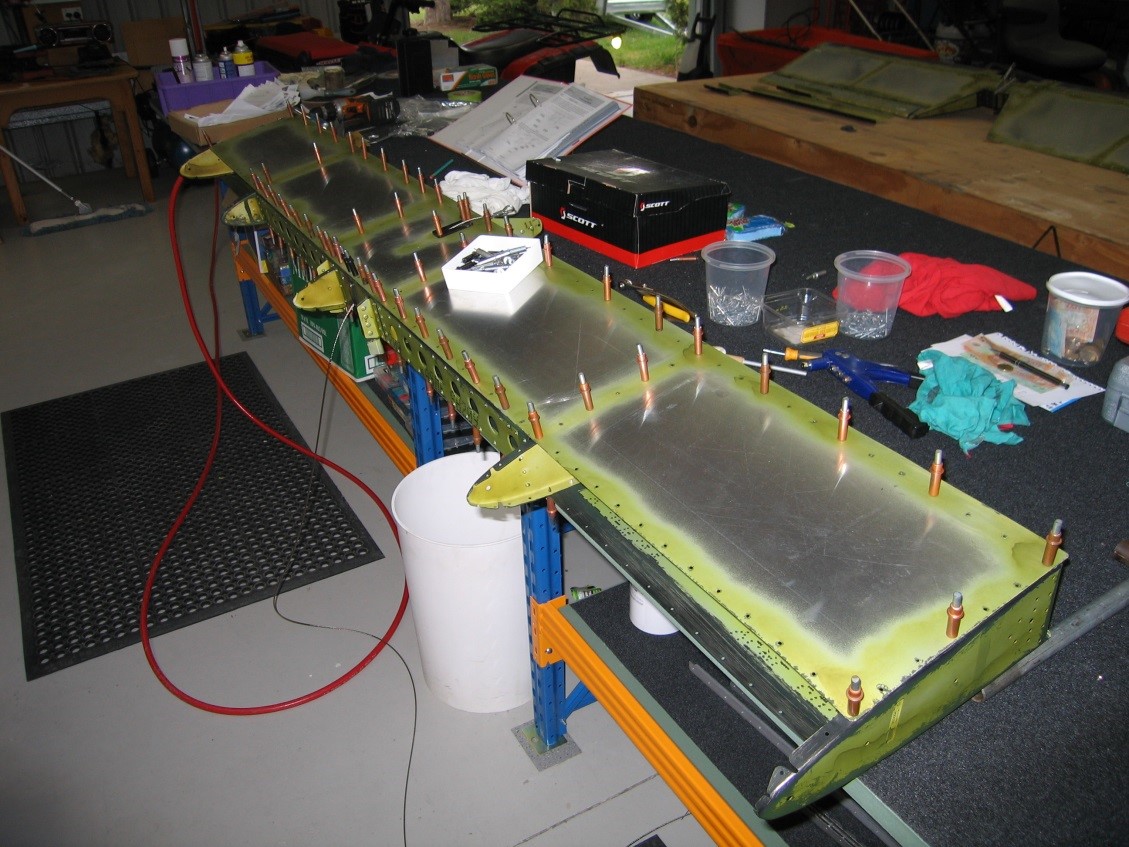
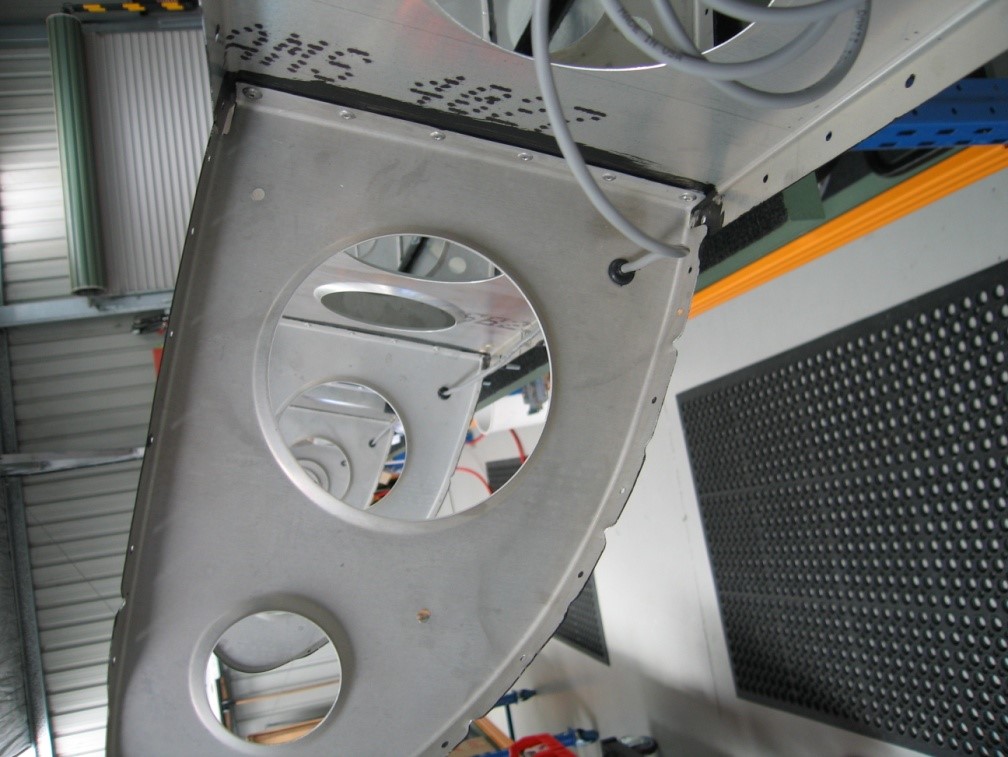
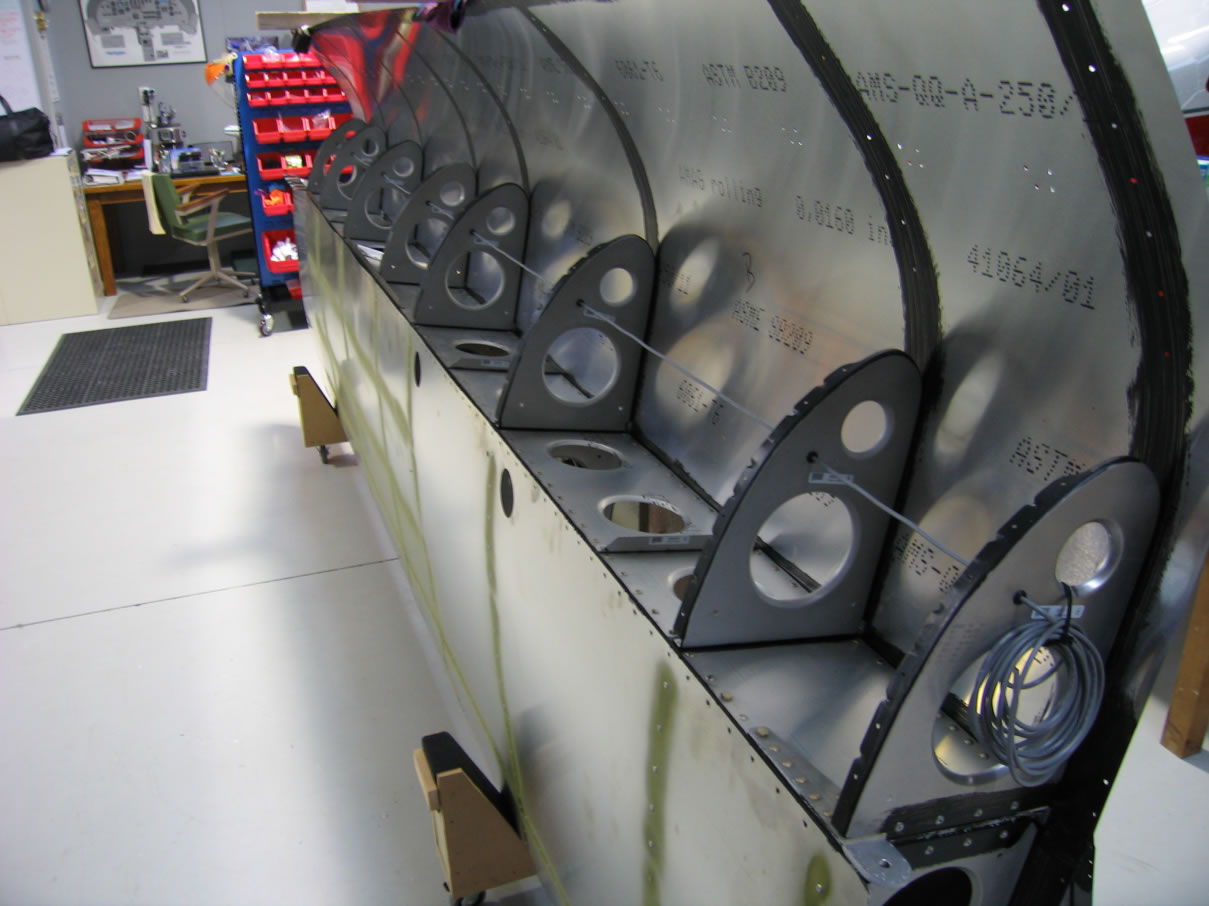
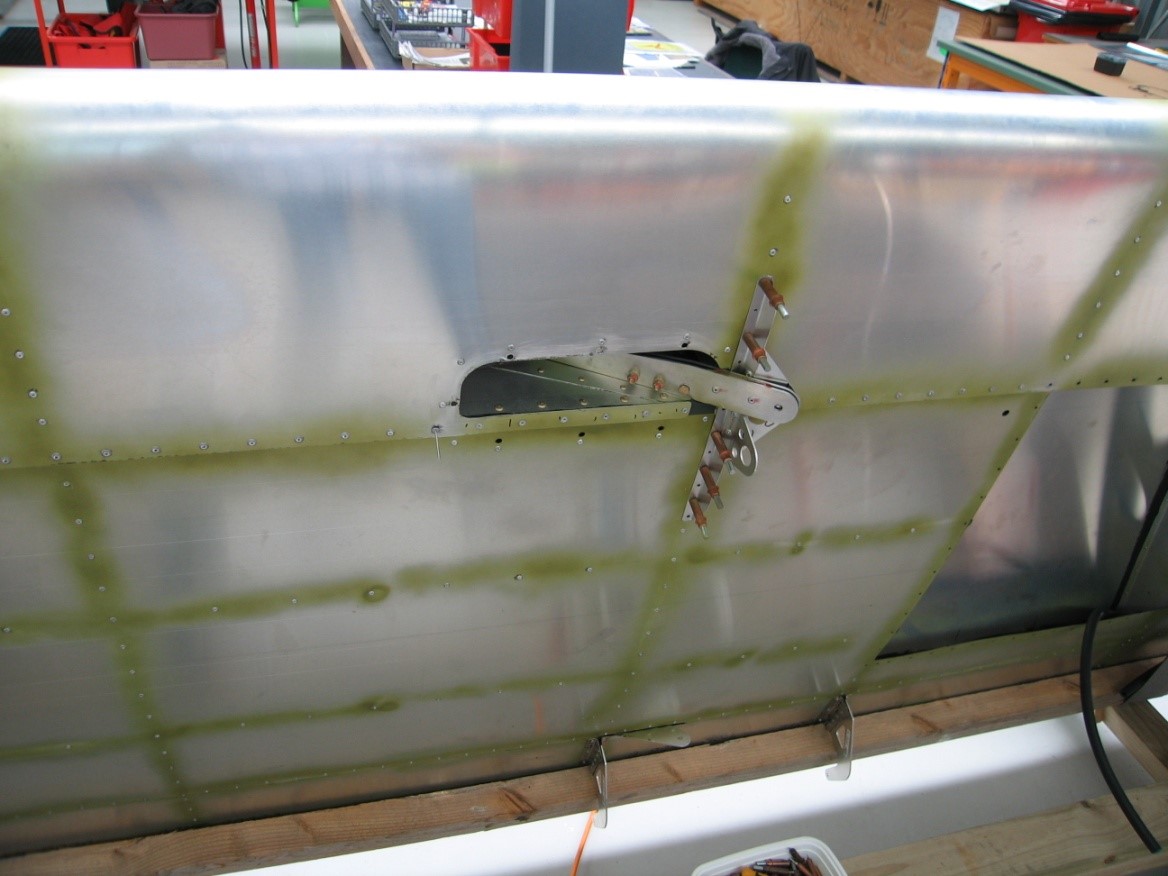
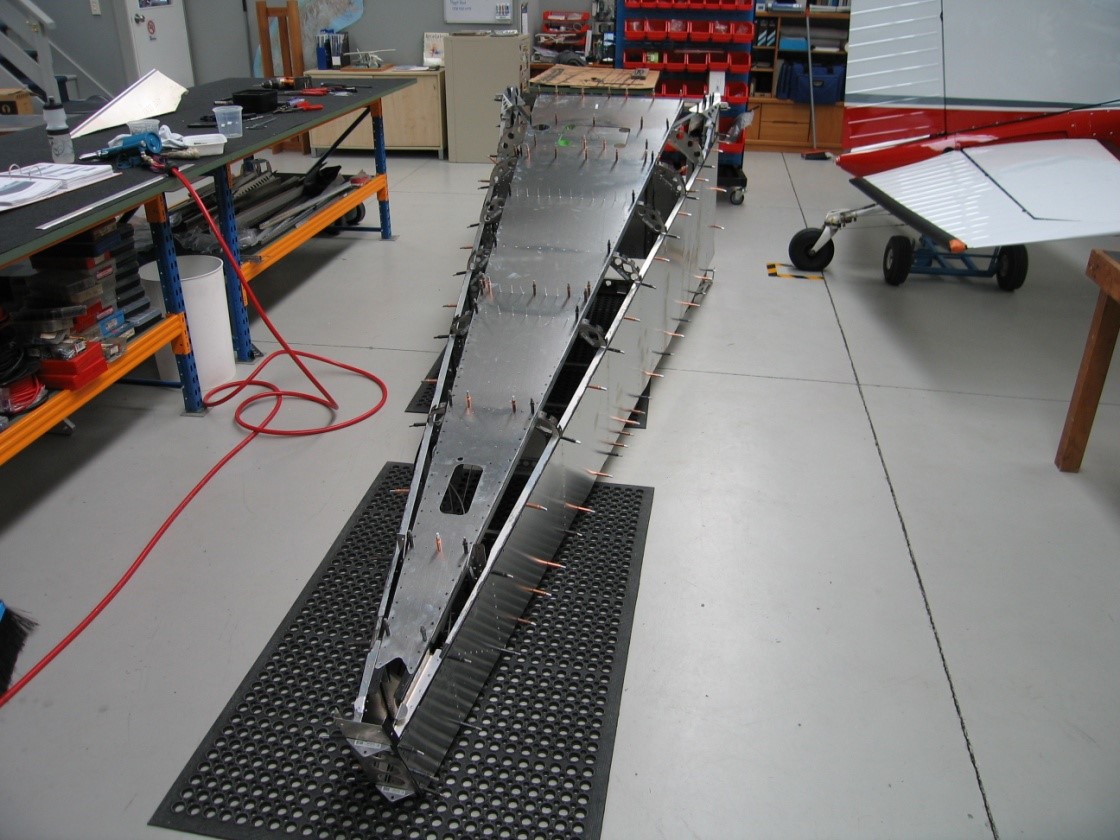
Horizontal Stabiliser assembly continued.
The control cable then had to be presented and placed before the skin goes on. As per instruction the skin has to be presented with multiple cleco’s commencing in a central position. In addition, consideration of lining up the leading edge over the forward longeron is important while riveting the skin. Lastly refer to jpeg 19 in the build summary and note an angular stiffener was placed under and along the join of the leading edge skin on the Left and Right hand side between the outer and first inboard rib to prevent any deformation of the leading edge.
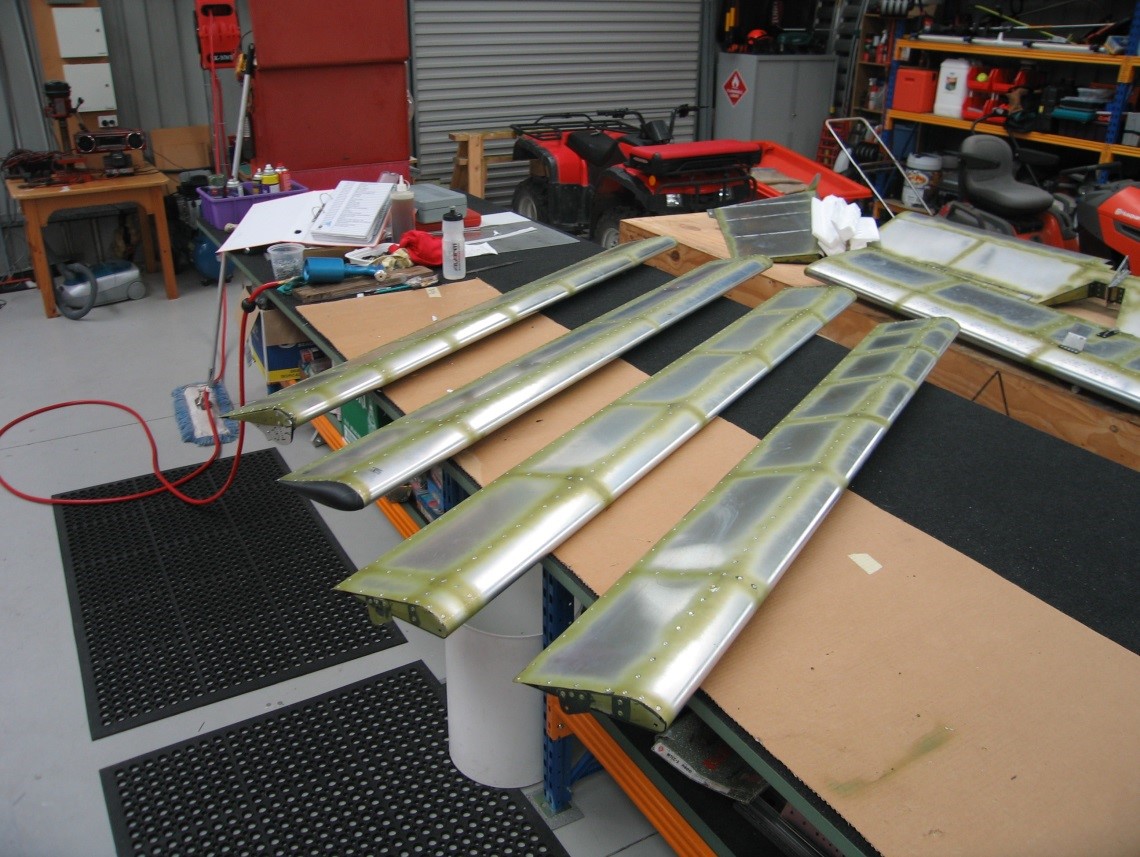
Assembly of Ailerons
This was generally a very smooth process, made a stiffening bracket for the inside of the outer rib. It is known that the rivets on the mounting bracket joining the aileron and flap together have sometimes shown wear at high hours. This will prevent this occurring on this airframe.

Assembly of Flaps
Similar to the Ailerons, a steady day patiently working on pieces easily manoeuvred about on the work table.
Right Aileron
Work finishing the trailing edge with the blind riveter. Good finish achieved when patient. Ailerons and Flaps now complete and preparation on the RH wing began in the afternoon.
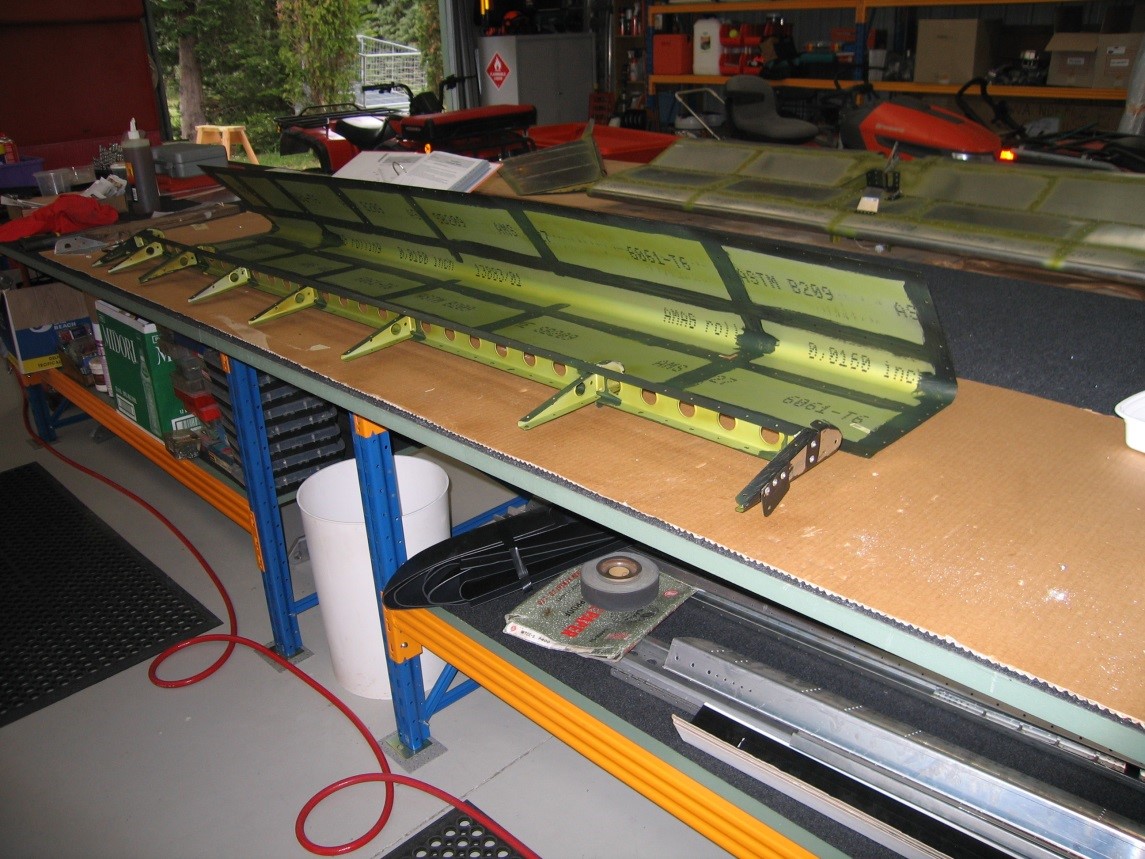
Right Wing
Right Wing ribs and rear longeron prepared. The frame then attached to the main spar. Leading edge ribs then attached. Snug in our home made wing holder ready for the Left Wing to join it.
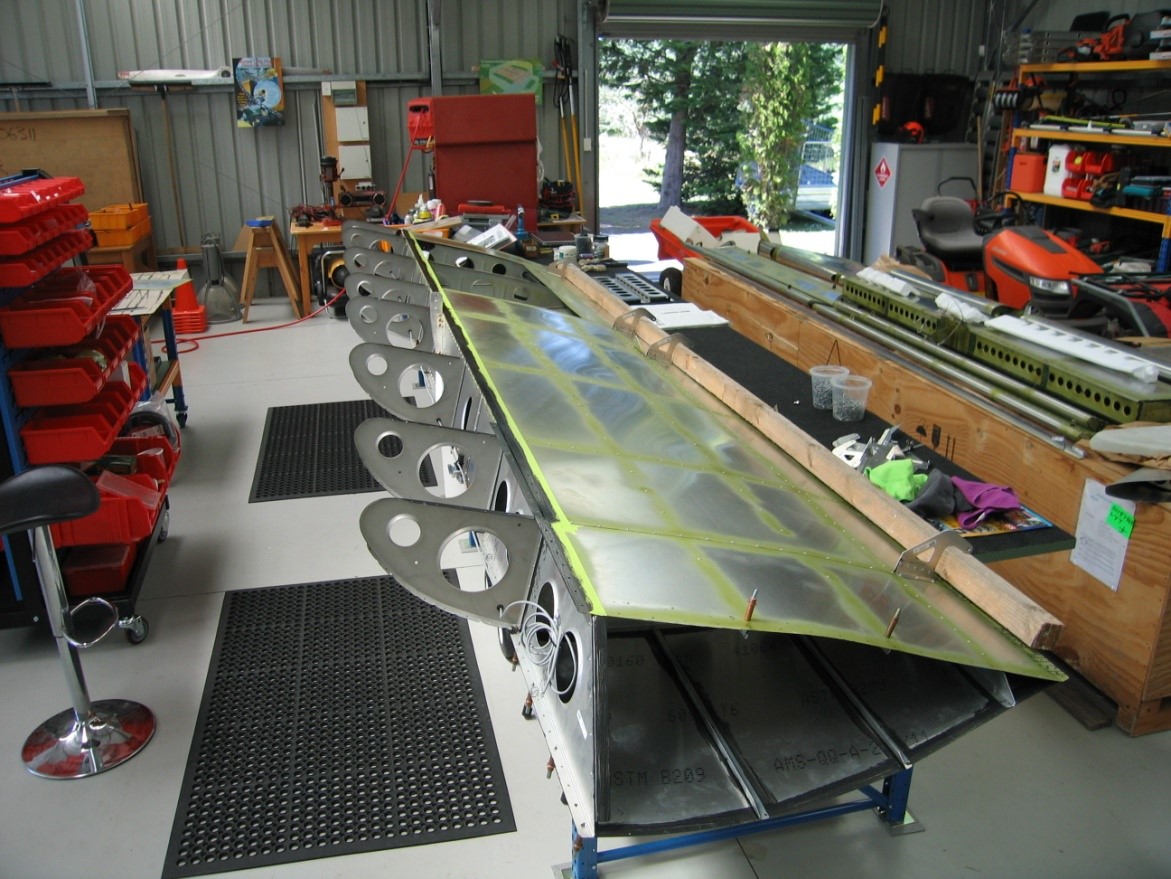
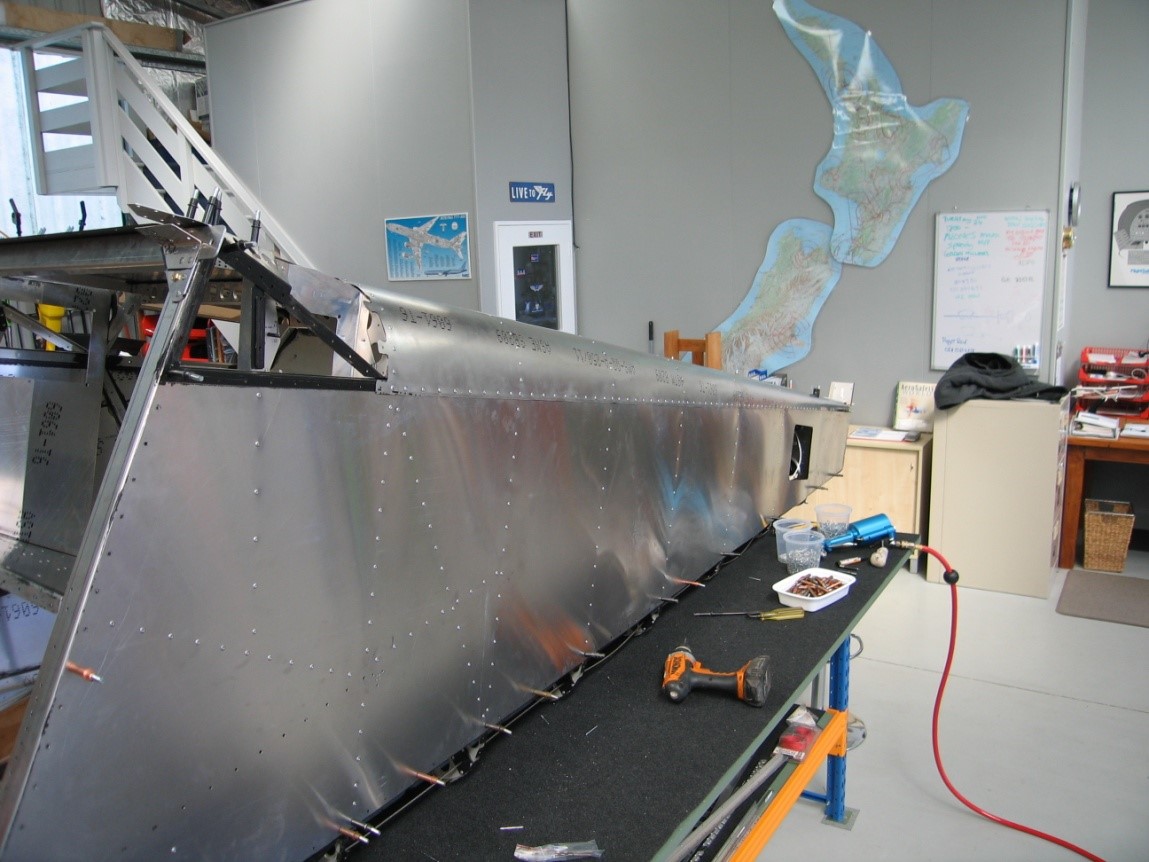
Left Wing Ribs
Left Wing ribs and rear longeron prepared. The frame then attached to the main spar. Leading edge ribs then attached. Ribs to rear longeron and main spar was again fairly straight forward, the top skin positioned, cleco’d and about to be riveted.
Fuel Tanks
Preparation and temporary placement of fuel tanks into the wing structure including framing and associated tank plumbing. Along the way we decided to upgrade the quality of the fuel hoses and place a nipple on the outside of the fuel tank to allow a smaller radius in the fuel hose pathway.
Fuel Pipe Pathway
A bit of work involved with fuel pipe pathway and making brackets to strengthen the ribs through which the pipe passes, nice and snug with grommets in place. Worth the time taken to make it all simpler and safer.
Wing Tip Strobes
More wing work today included wiring for the Wing Tip strobes. Time taken to review the manual and do some admin work with CAA and research other Savannah builds on the Web.
Wing Work Continued
Continued with wing work, fuel plumbing and tanks and sorted aileron and flap brackets out prior to skinning.
Making Progress
Right Wing progressing well, figuring out that it will be easier to fold using the Flap and Aileron brackets to position a 50mm x 50mm x 5M piece of Oregon at the base and a 25mm x 100mm piece at the top cushioned from the aluminium by corrugated cardboard. Using 4 straps, we will gently tension and fold after the bottom of the wing rib is secured.

Finishing Touches
Finishing touches today to this wing in particular the wing tip assembly, now a single piece of fibreglass which fitted snugly into place. Minor trimming taken to make it look sharp and attain the lines we liked. Holes drilled to reposition the tip when fitting and installing strobe assembly prior to painting.
Left Wing Continued
Left Wing work continued steadily, time taken to plan ahead with items needed next week and time taken to review master build photos and discuss options for painting including visits by reps from several suppliers. Undecided on a final paint scheme but ideas flow daily from both Haydn and I.
Wiring and Plumbing
Today taken up with some admin work, wiring and plumbing, we also positioned and cleco’d the leading edge, ready for folding.
Wing Assembly Continuing
Another day of wing assembly, getting it right with the leading edge bend and taking the time to roll it slowly and locate the holes to cleco. Very satisfying to complete this task. A little stress evident on the fold over the leading edge ribs but that is not unusual with such tight tolerances.

Riveting FInished
Finished the riveting of the leading edge this morning, setting the wing back in the holder it made easily presentable to rivet. The afternoon realised we did not have enough cleco’s to assemble the fuselage frame, but none the less it was satisfying to see it form. We also had a flying visit to the hangar by fellow Savannah owner Alistar Millar in his ex Australian green XL which is now ZK-CVK. Great for Haydn and I to talk Savannah’s together with him.

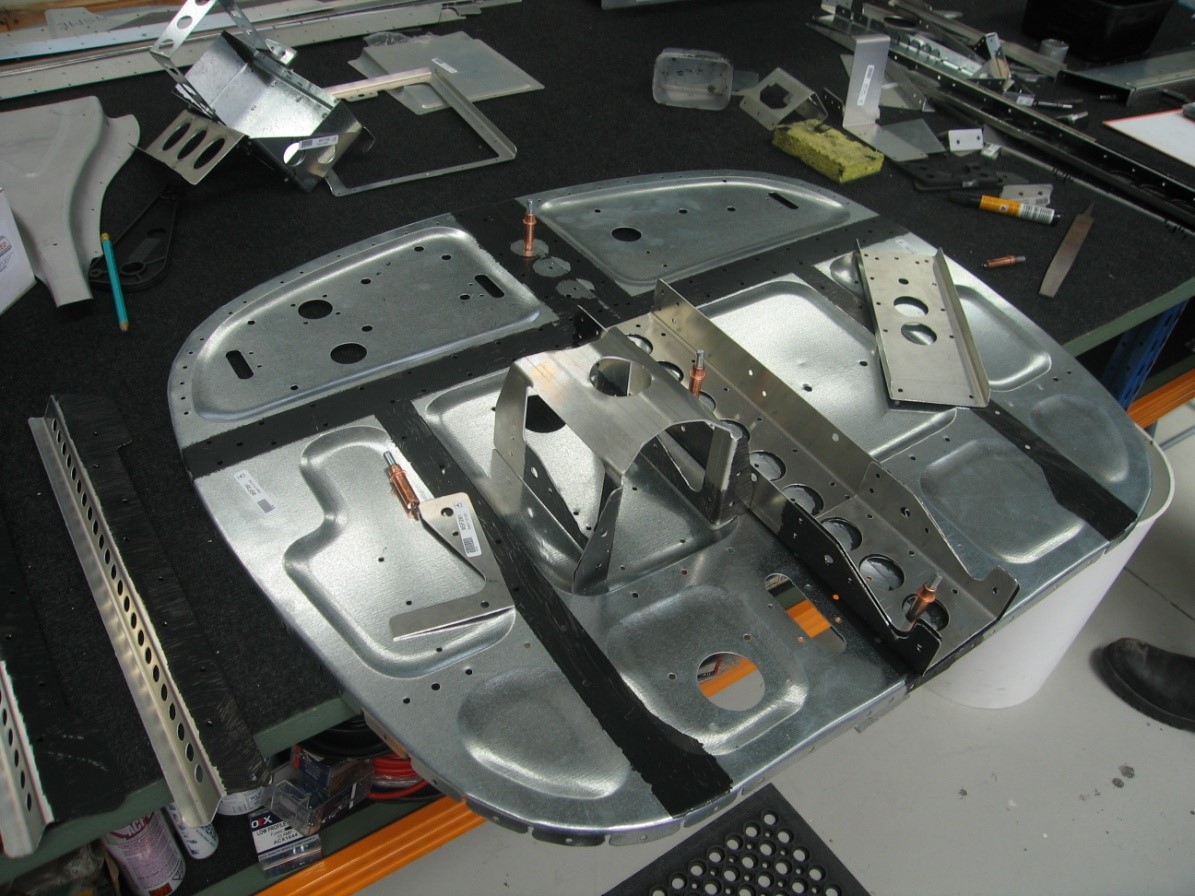
Fuselage Assembly
Fuselage assembly continues, reframed and preparing the side fuselage panels. It’s amazing how many cleco’s one can use and realistically not enough supplied in the kit. However plastic ties come in handy when there are not enough of them. Photo above of the battery box snug underneath the baggage area.
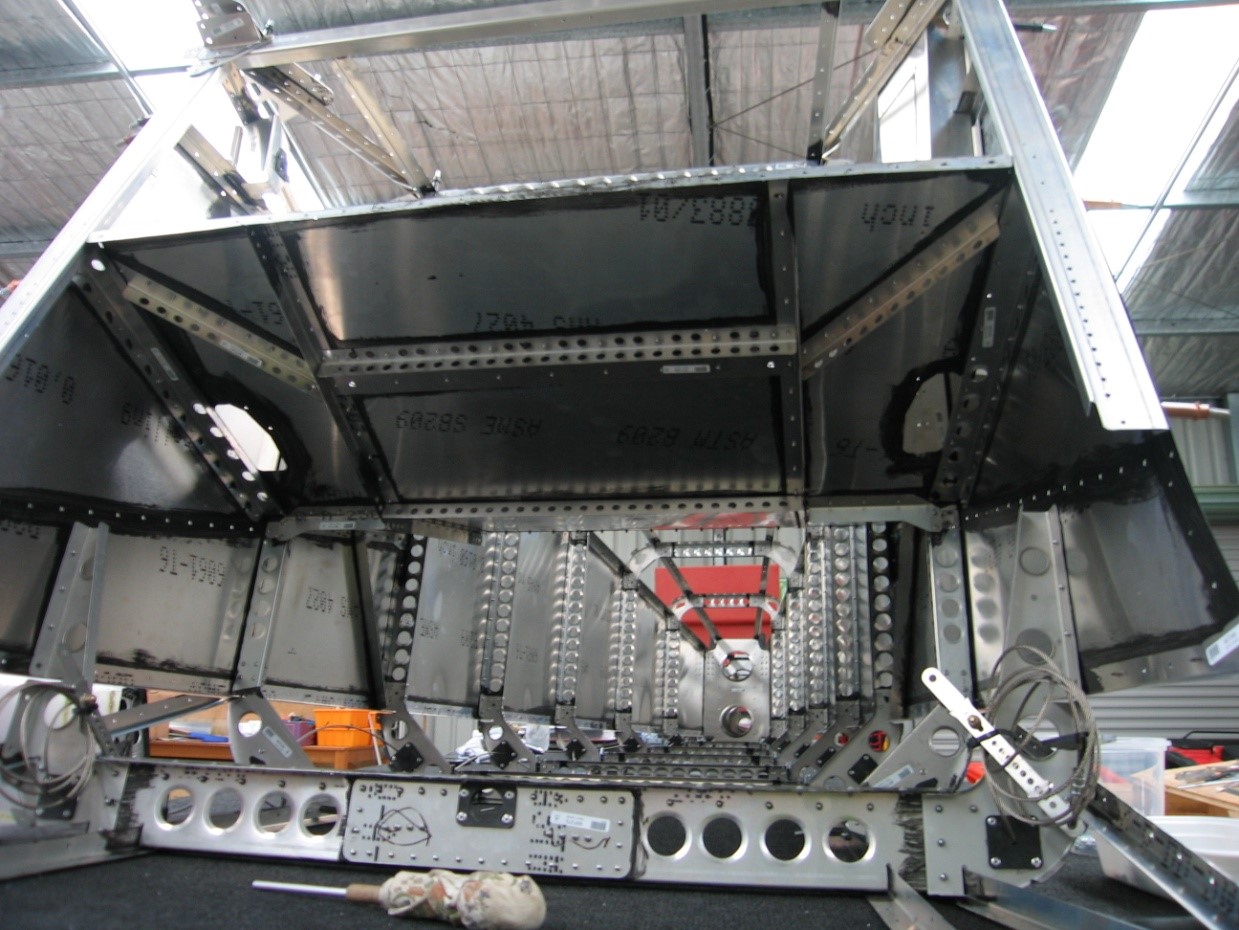
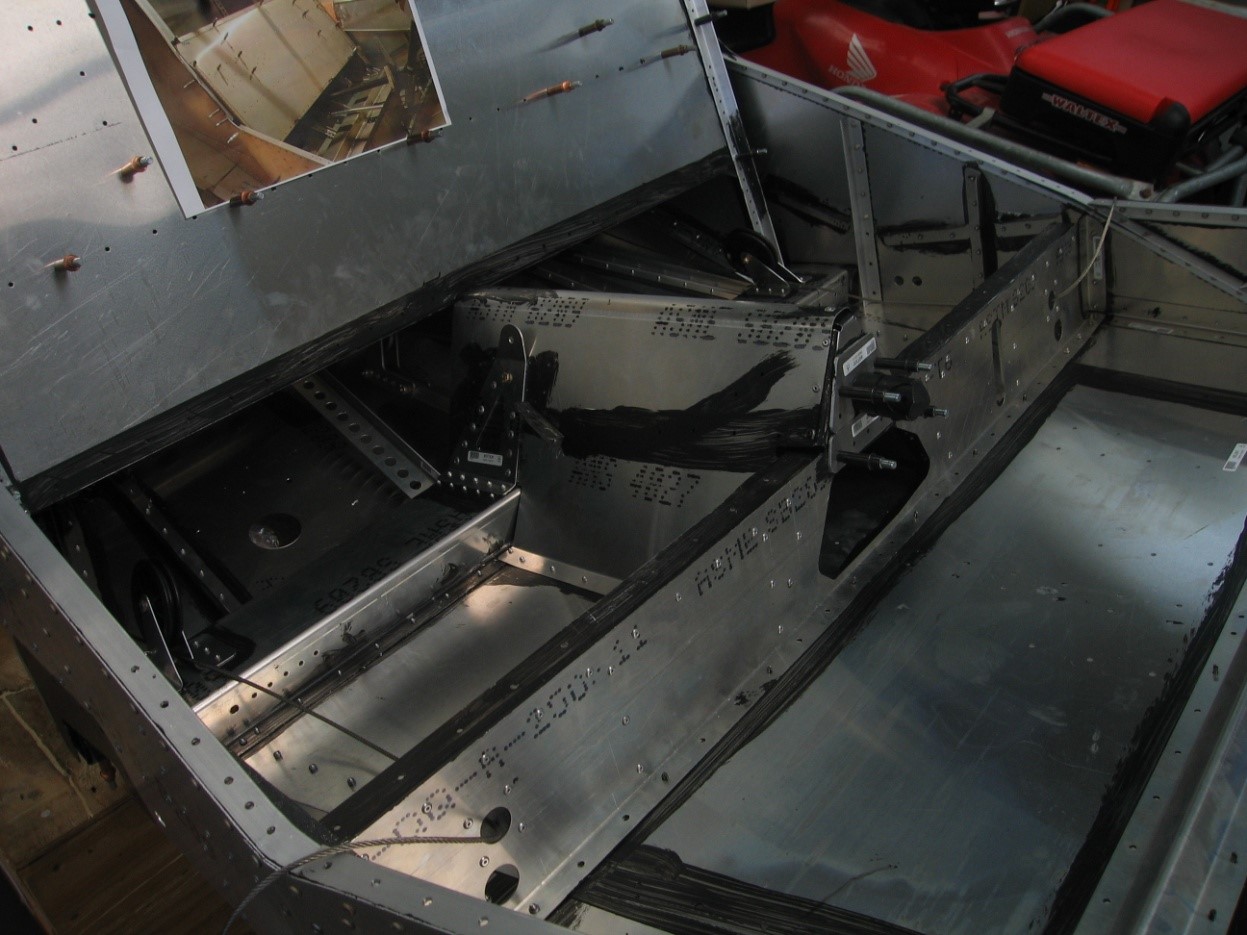
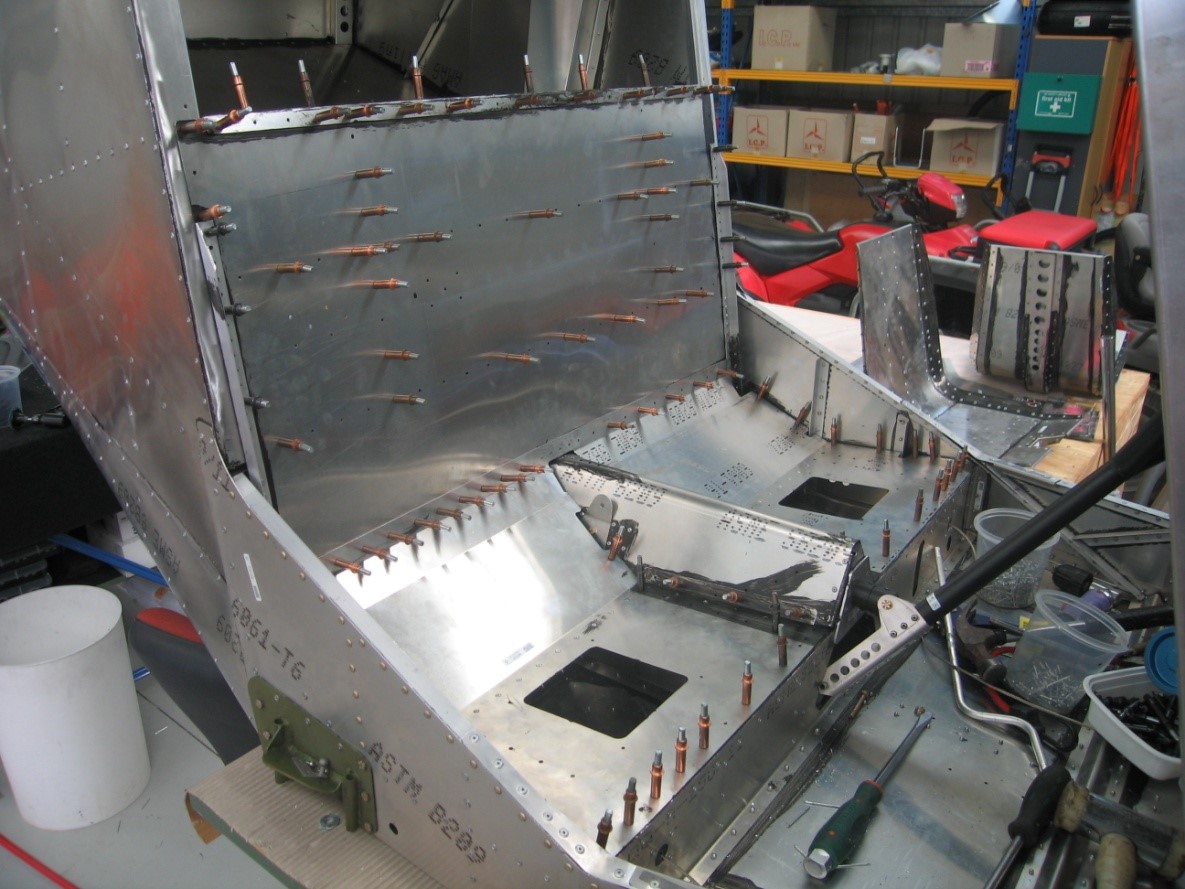
Extended Baggage Section
A full day preparing and then installing the extended baggage section, it’s a very busy area, lots of rivets here which in turn adds considerable strength to the assembly. My son Mark (smaller than us – Haydn 6’4″ and I only mere 6′) contributing his work to this area and finally beginning to understand the strength that this airframe develops as the build progresses.
Extended Baggage Section Continued
Installed the covers within the extended baggage area that protect the aileron flap control rods and then electrical wiring for the elevator trim. Final preparation tasks completed for the top and bottom skins and these were then positioned and riveted. A very satisfying fit, with no hole out of alignment.
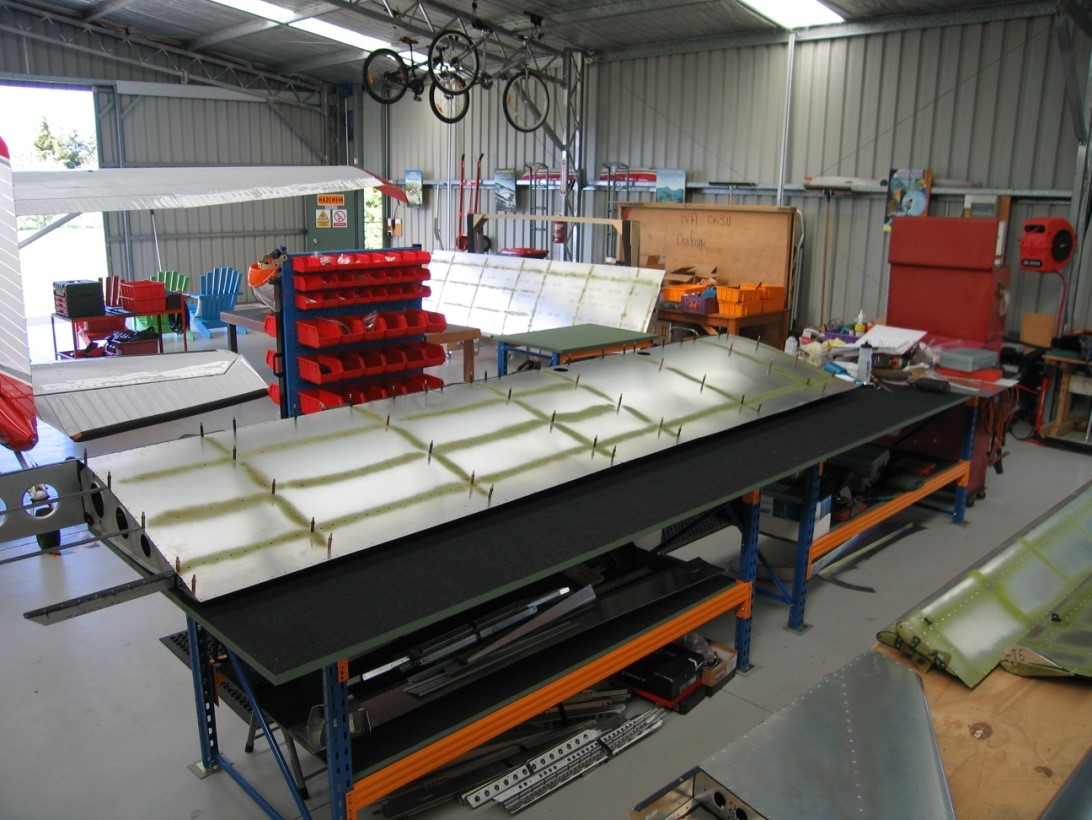
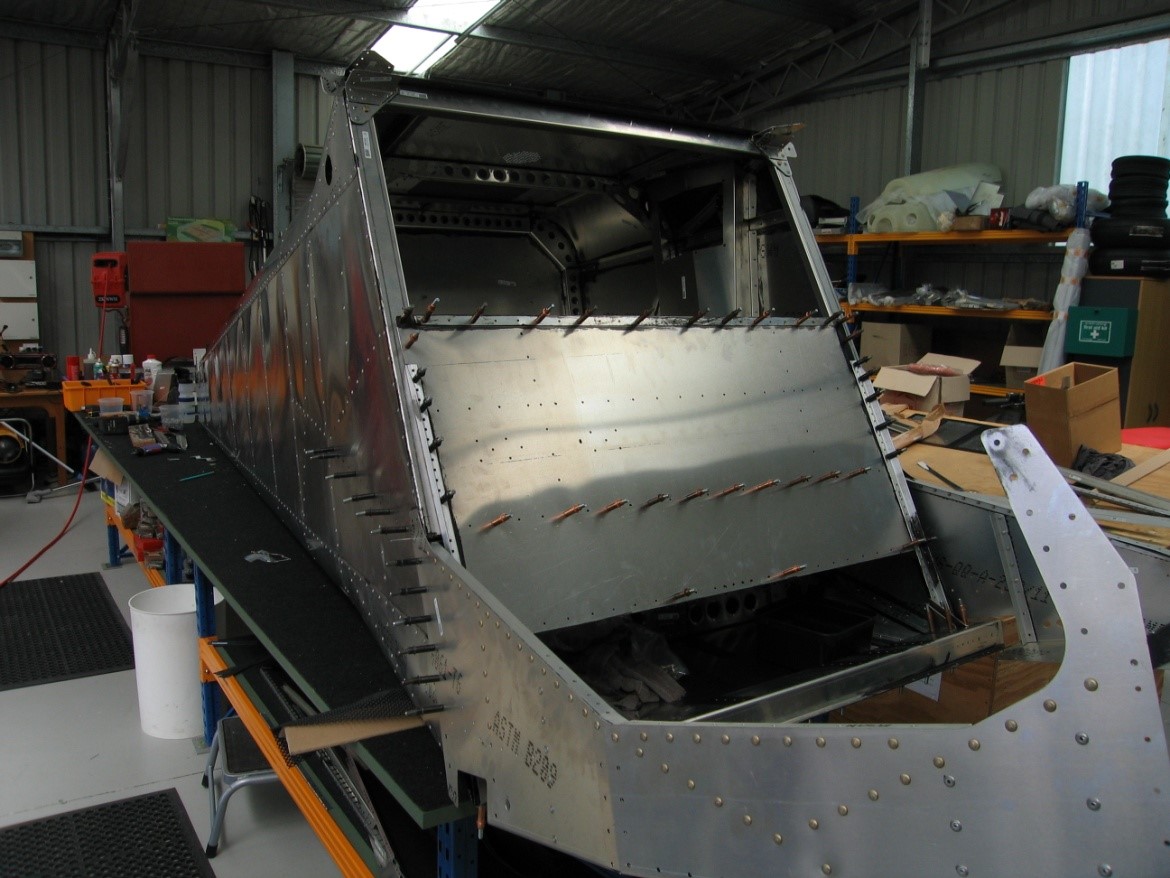
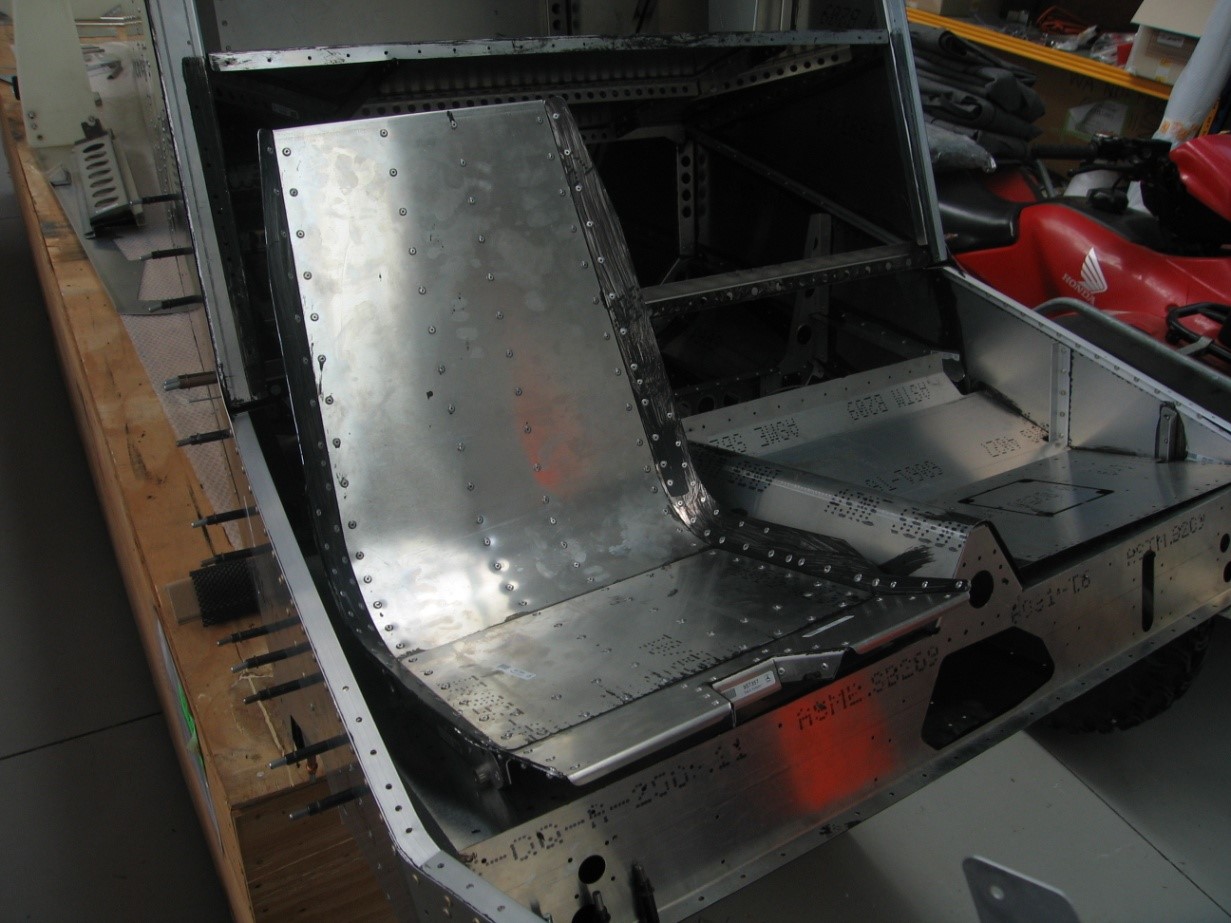
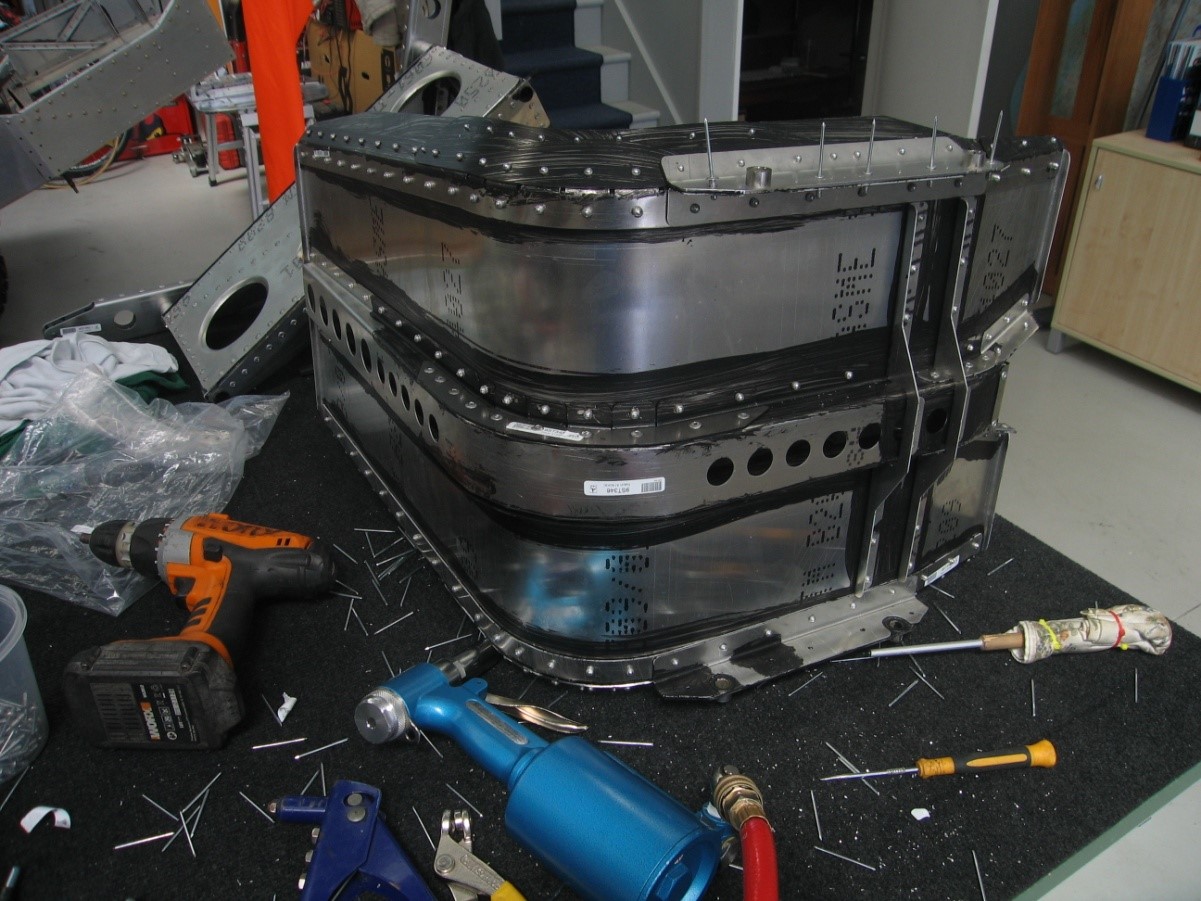
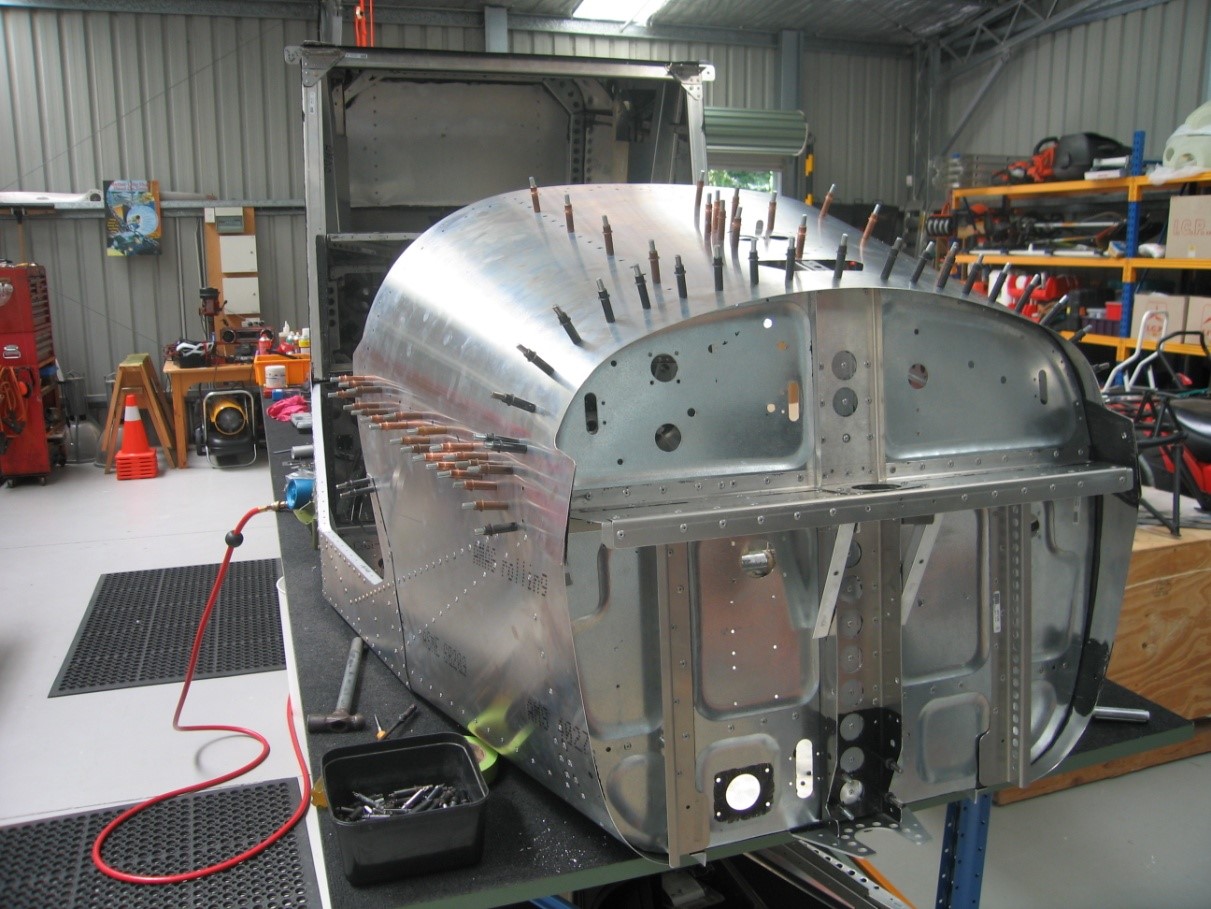
Savannah S Curved Skins
Today the signature Savannah S curved skins are positioned and riveted to the frame. It is cleco intensive and with only a hole or two to prodger to locate holes, a very satisfying days work. Haydn complaining of cleco pliers blisters LOL.
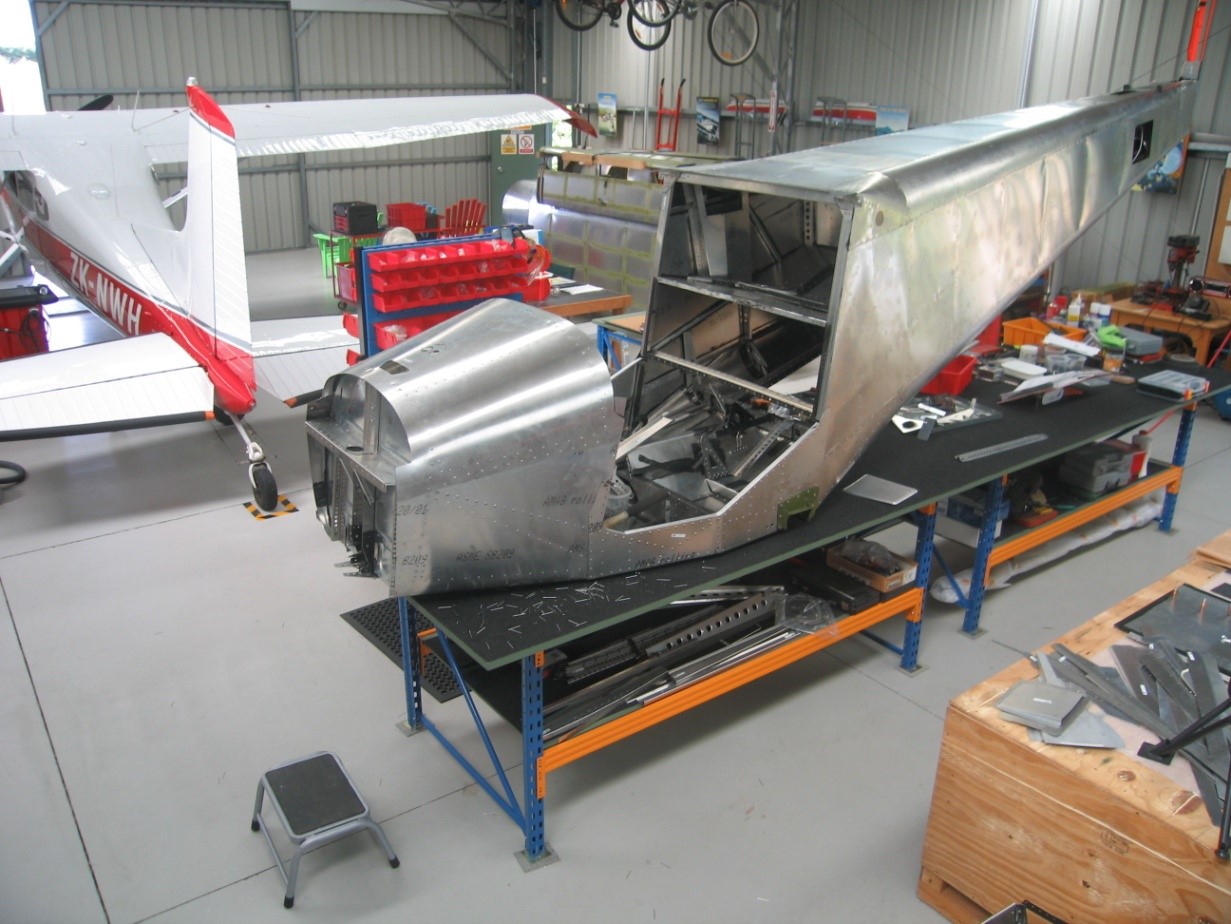
Curved Skin Installation Continued
Another day of curved skin installation and then the time consuming 90 degree shoulder bend to patiently complete prior to placing the lower door frame into position at the end of the day. A very busy area and much to do next week.
Building The Flap Mixing Unit
While we think about the location of several parts elusive to us today with the aileron roll torque tube, we decide to concentrate on the build of the Flap mixing unit and cleco together the new adjustable seats.
First Seat Completed
Much preparation needed applying the black goop today after disassembling the seat and coating the mating parts, resulting in the first completed seat.
Second Seat Completed
The second seat this morning assembled quicker knowing the routine.
Planning Day
A bit of administration, reading the manual and planning day. Haydn and I discussed paint scheme options and later finishing a few items in the cabin. Cut out the numerous carpet items and looked for a few elusive parts that always seem to show up where we least expect to find them. The Inspection panel was made and installed on LHS aft fuselage

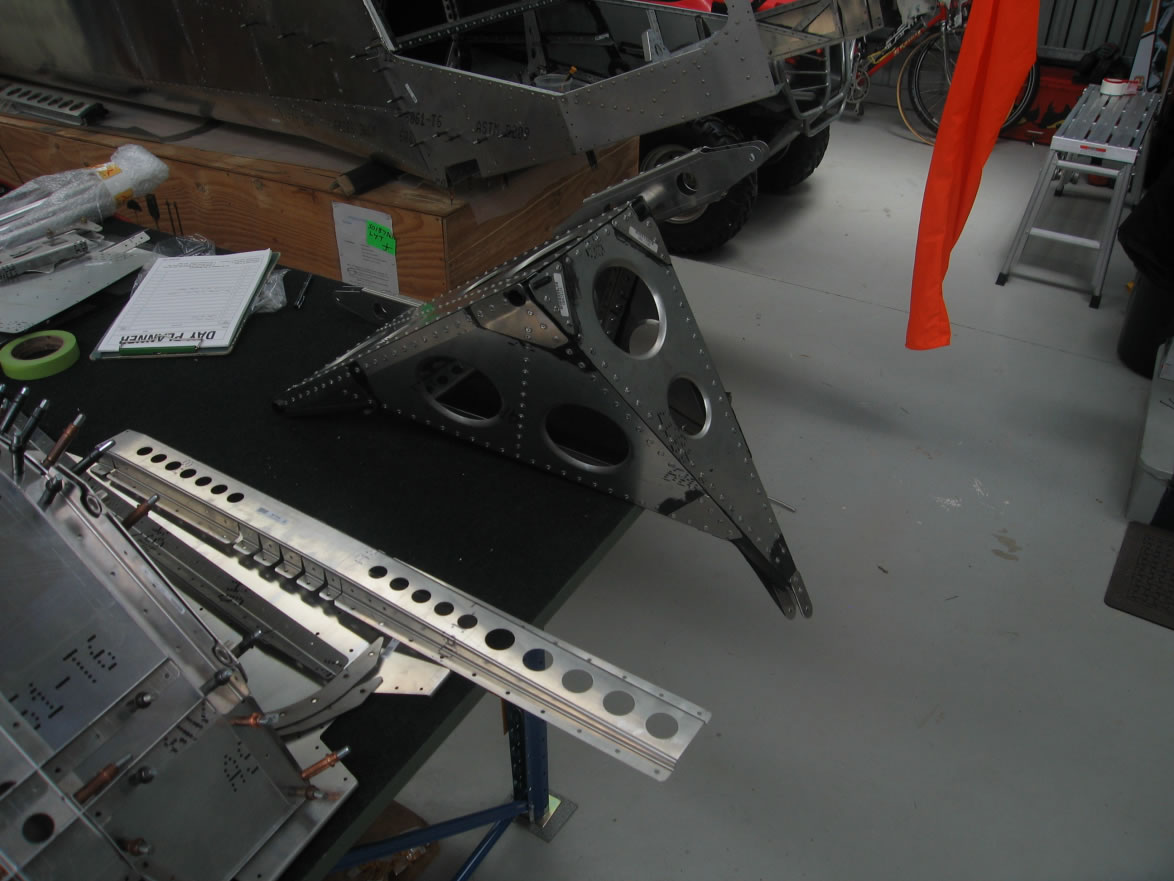
Undercarriage Tunnel clamp/strut Attachment Plate
The undercarriage tunnel clamp/strut attachment plate was primed yesterday and allowed to dry overnight. This is normally a very “busy” part of the build but we thought of a novel way to manoeuvre the plate when inserted into the tunnel. A piece of 4” x 2” x 18” stud timber was screwed perpendicular to a plywood base (roughly 18” x 18”) to make a T shape. This worked by twisting the wooden base and with it wedged against your hip, wiggling the plate to fit snugly and positioning it one bolt at a time.
Thick L Bracket Installation
We installed a long thick L bracket either side of the lower interior frame, aft of the undercarriage tunnel before concentrating on the forward firewall assembly. After a practice assembly, the black primer (goop) applied and then firewall reassembled and riveted. This took the remainder of the day.
Firewall Work
Firewall work continued today setting off the internal engine mount brackets that are bolted to the firewall and fuselage longerons. The window and cabin frame jigs were then set into place.
Engine Mount Practice
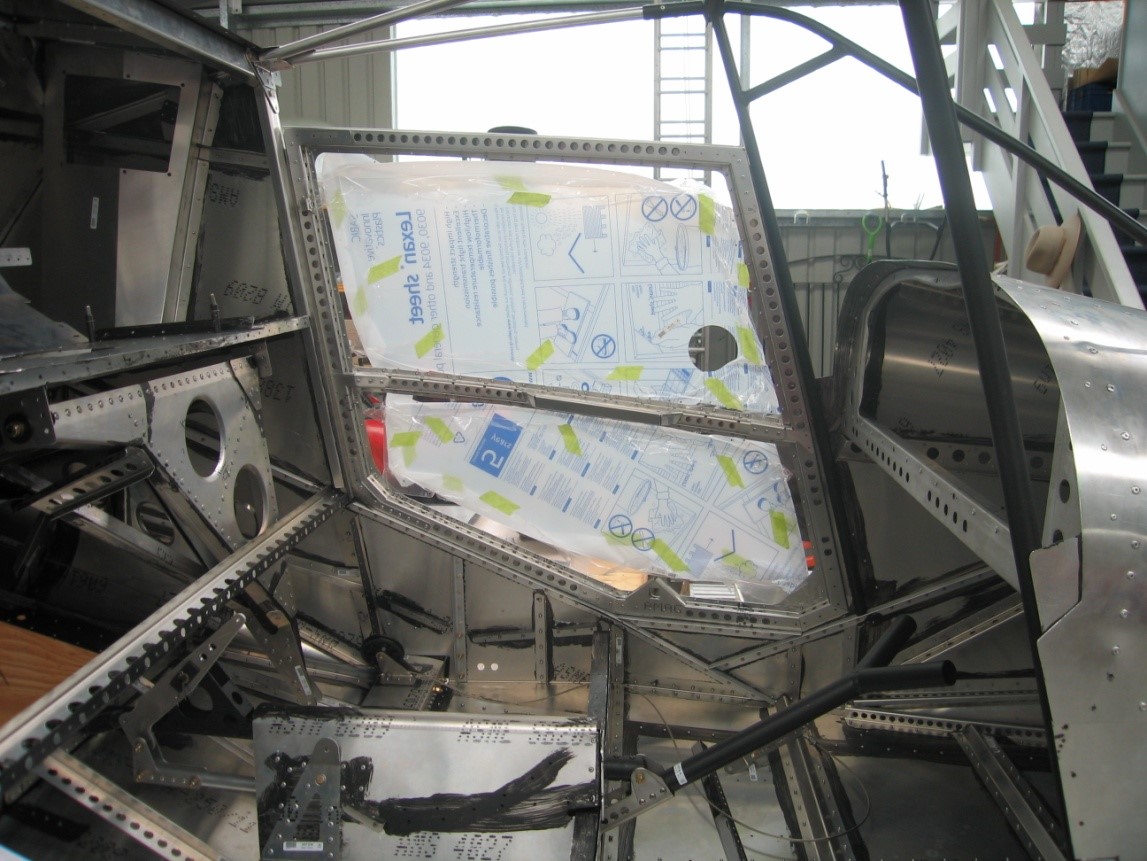
Riveted off the top cowl and then practice installed the engine mount onto the forward firewall, all good. Later installed the windscreen frame and jig and prepared for their positioning.
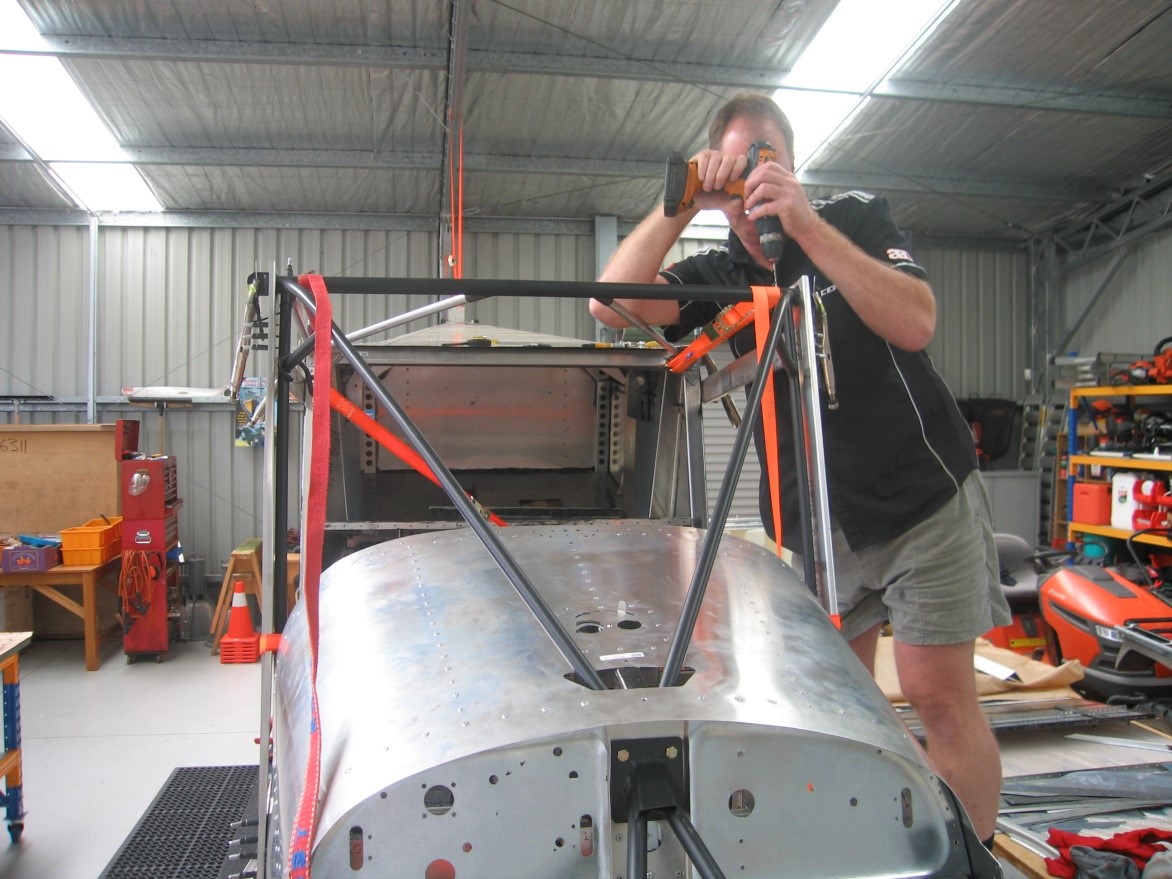
Squaring Off Fuselage to Wing Frame
One of the most important build days today, measuring and squaring off the fuselage to wing frame. We took our time using straps to brace and counter brace to align square and diagonal within 1 mm, re-measured again many times before finally riveting the structure into place. A satisfying day, we will see how good it was when we introduce the wings to fuselage after painting is complete.
Door Assembly Begins
Door assembly began today, discovered an arm rest that was not included in Haydn’s first build to his delight. Considerable discussion on the elusive paint scheme and sourcing EAA magazines from many years ago we trolled for ideas. We sadly lacked talent in this area and have resorted to colouring competitions on a Savannah plan, my children will help.
Second Door Complete
Second door built today and worked on our list of’ jobs to do prior to painting’.
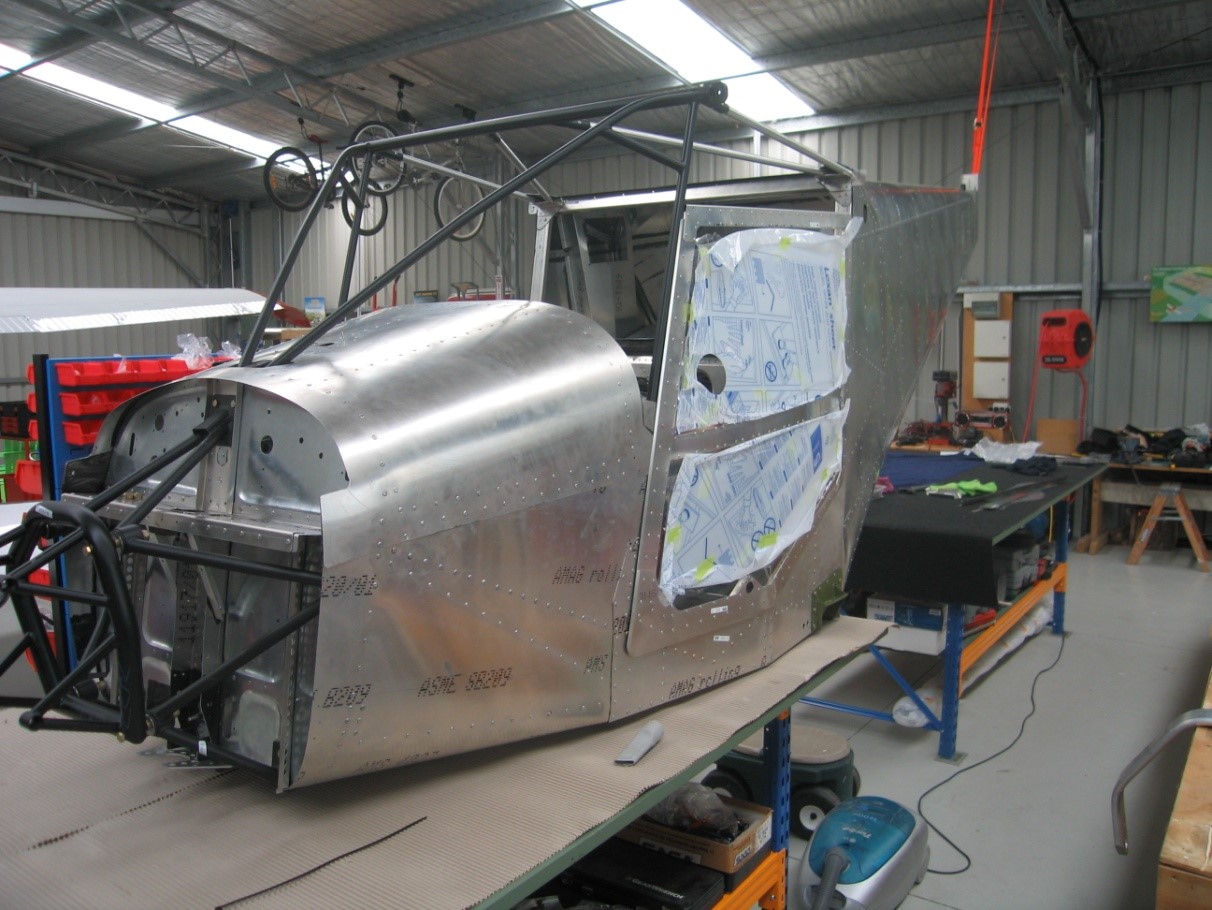
Positioning and Shimming Doors
Positioning and shimming of doors a patient process to achieve the correct placement of the door hinges. Washers and octopus straps came in handy rather than someone holding the door in place. All very tight margins, even a coat of paint will affect so improvised by buffing the trouble spots to allow for the paint coats.
Seat Back and Pans Installed
Seat back and pans put in place and riveted home today. Lots of head scratching on the tunnel and the flight controls because of a tight fit.’.
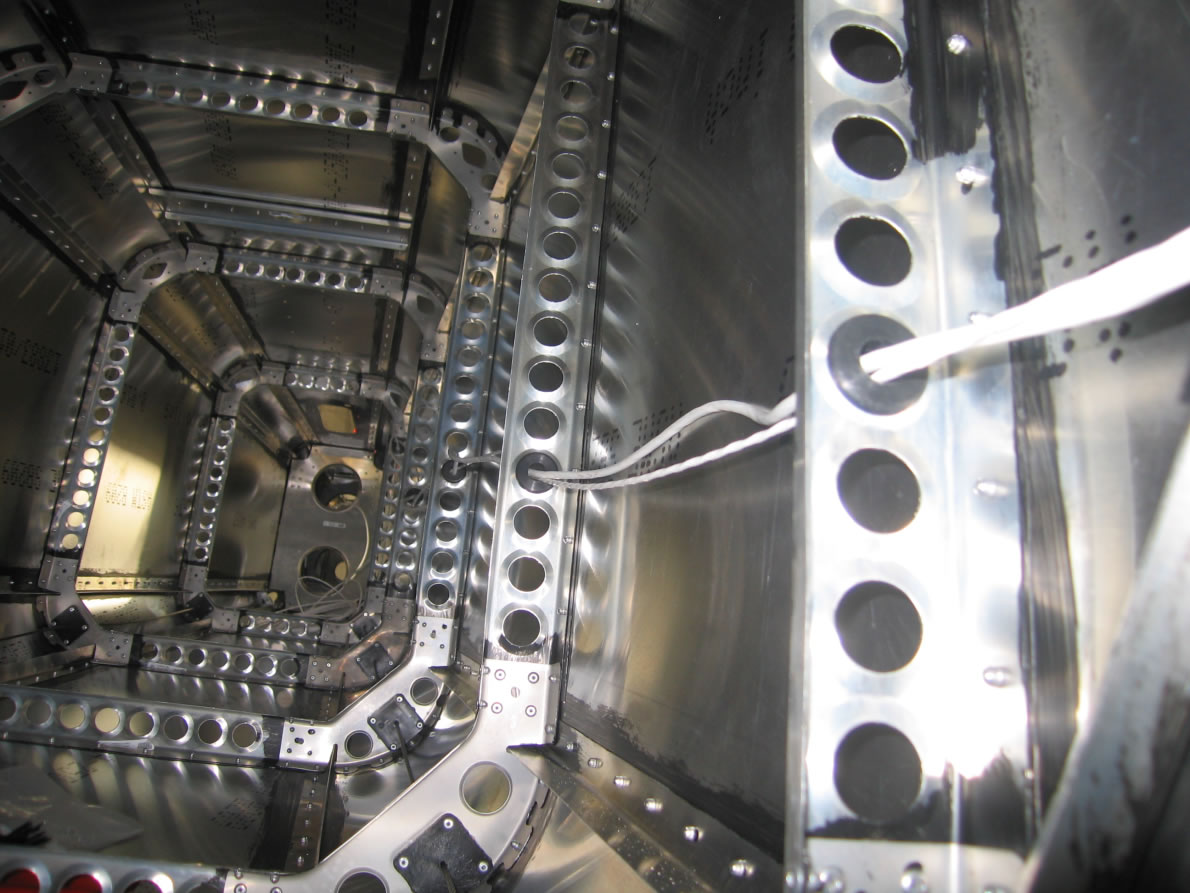
Anti Collision Light
Into the fuselage tunnel today to channel wiring for the anti collision light on the tail and the elevator trim. Dzus fasteners installed for the lower inspection hatch and several fuselage rivets drilled out to place a shim in position so as not to have a dimple visible.
Painting stage next.